Microwaving Wood For Turning Questions,Used Woodworking Routers For Sale Guide,Dust Collection Bags Woodworking 500,Carpentry Shop In Bermuda Young - Plans Download
27.03.2021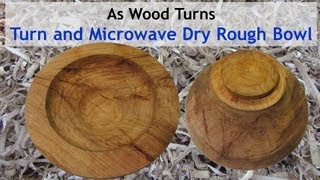
With once-turned bowls, because the bowl walls are usually thin and will quickly leach out moisture and potentially dry uneven, we are trying to slow and even out the drying time. The first turning is deliberately oversized and designed to take the stress of change during drying. A once-turned bowl is a piece of green wood turned into a bowl at final shape and wall thickness. After the turning, the initial form of the bowl is finished at that point.
Now, nature takes over. With a once-turned bowl, depending on wall thickness, the piece will dry, move and transform into its finished form as is dries. If the bowl is turned thin, it may shift, warp, and buckle much more noticeably.
This can be a desirable or not-so-desirable effect. Either way, a thin-walled bowl will dry quickly, usually within a few days, and reach its finished look in a short time. Very thin walled bowls can dry in a matter of hours.
It is not recommended to seal the end grain of once turned bowls. Sealing end grain is more important with twice-turned bowls, which we will cover in a moment.
Once-turned bowls tend to have a very organic, natural look to them with offset curves and rims that may rise and lower from side to side. As the name implies, twice-turned green bowls will be turned twice. Why you might ask? To obtain a more accurate round shape for the final bowl. The first turning of a twice-turned bowl will be allowed to thoroughly dry.
In the process of drying the bowl will usually pull outward at the pith, contract on the sides and essentially stretch. Basically, we let the first turned bowl do all the warping, moving, and shaping, then, once dry, turn it a second time to the final shape and final wall thickness. Because the wood, after the first turning and some time, is dry or equalized, the amount of movement after the second turning is minimal.
All of the methods below will work for twice-turned bowls. Sealing the end grain of the bowl slows the amount of moisture leaking from the open end grain. The goal is to have a more even moisture loss from both the side and end grain. Final twice-turned bowls usually look perfectly round with clean circular rims and fresh, crisp lines. Take a piece of green wood and turn it into a finish shaped bowl or a rough-turned bowl. Set the turned bowl aside.
Again, remember every wood species is different, and all the external forces acting on that bowl are always present. Some woods are super cooperative, and you will have no trouble, while others species seem to crack when you look at them wrong. The finished turned bowl needs to be reasonably uniform in thickness throughout. If, for example, the walls near the rim are thin and the base is thick, more moisture will remain in the base after the thin walls have dried and this can cause uneven stress to crack the bowl.
For a final turned bowl, think how the environment will affect the equalizing wood. A low, cool, dark, sealed cupboard will be a much better storage location than a countertop, in the sunlight, near a breezy open door or heat source.
Set the final turned bowl aside and hope for the best. In a few days or weeks, the results will be revealed. I have turned green wood and done nothing else to it afterward, with decent results. The bowls that come to mind were turned from two-year-old cut hickory, so, while green, the wood was much drier than when first cut with the chainsaw.
By the way, there are many aspects to making your chainsaw blade sharp at all times. Check out this article for all the tips to perfectly sharpen your chainsaw. Another contributing factor is the nature of the hickory species, which is a solid and stout structure. Even though they dried fine without cracks, there was some movement, noticeably waves along the rims. Yes, brown grocery bags work well to allow the wet green wood bowl to release moisture slowly and evenly over time.
Because the paper bag breathes, it will gradually release excess moisture and progressively dry, exactly what we need. The paper bag with wet fresh shavings makes a controlled micro-climate for our wet green wood bowl. Simply collect some wet shaving from the shop floor, preferably the ones from the same bowl, and line a paper grocery bag. Place the bowl or roughed blank inside, cover the bowl with more wet shavings and fold over the bag top and loosely tape the bag shut.
Put this is a cool dark area that has little air movement. A cabinet or cupboard works well. This is an important note. In moist locations with humidity, plastic bags will hold in moisture and most likely cause mold, bacteria and rot to form, not things we want for our beautiful bowls.
The exception to the plastic bag rule is severely dry, arid locations, such as the desert. In these locations, plastic bags are used to try to retain moisture in the green wood bowl longer and slow the evaporation process.
For the rest of us, that live in areas where there is a fair amount of relative humidity in the air on a regular basis, paper bags breathe and help regulate the passage of moisture very effectively.
The moist, fresh shavings will slow drying but because they are surrounding the bowl, they aid in regulating or buffering the amount and speed at which the moisture leaves the green wood bowl. After a week or so, it is a good idea to move the green wood bowl turning to a new fresh paper bag. The fresh paper will prevent excess moisture build-up and reduce bacteria or mold formation.
Approximately every week or so, days if the piece is thin check the piece and see if it is drying evenly without cracks. Remove the shavings if they are dried up. Return the turned bowl to a new fresh grocery bag without shavings, close the top, and return it to a quiet area free from too much air movement.
Check the moisture content of the wood as we will discuss below and once it equalizes the process is complete. If you have access to a dryer or kiln, this can be a great way to dry twice-turned thicker green wood bowls quickly.
However, again, I suggest experimenting with this process too. Every species will act differently. One bowl might dry beautifully in a dryer, while another may disintegrate. A homemade kiln can be made out of an old refrigerator, an insulated cabinet, or a box made from foam house insulation.
Just cut a vent hole in the old refrigerator base and one in the top and place a light fixture with an incandescent light bulb inside. The heat from the light will slowly dry the wood bowl blanks.
A systematic approach for advancing lightbulb sizes can be used to increase the temperature slowly and gradually over the course of several weeks by using progressively larger bulbs. Start with a 40w bulb, then a 60w and finally a w bulb. Check the moisture content of the wood with a moisture meter or weigh the pieces to determine when they have equalized.
Be careful, however. Keep in mind that quick, sudden, unstable changes in the wood structure are what will result in the most problems. So easy does it and the more even everything is along the way, the better. This method is best suited for drying rough-turned bowls that will later be twice turned to their final shape and form.
A kiln or drier can take the drying time for thicker twice-turned bowls from months or even years to only a few weeks. Microwave drying a wood bowl blank can be done with short times in the microwave at full power, around 30 seconds, followed by cooling time, around 30 minutes.
Repeat the process weighing the wood bowl after each session until the weight of the bowl stabilizes. If your bowl or roughed blank will fit into the microwave and if your spouse approves or is unaware you may want to try this technique.
A garage sale microwave, just for drying green wood in your shop might be a better way to avoid domestic disputes. Just saying. Microwave the turned bowl on high for a very short period, seconds. After each session, remove the piece and set it out to cool for at least a half hour. I place the blank on the counter in the kitchen and prop it up on a side so that most of the bowl has good air exposure.
After at least a half hour of cooling, I pop it back in the microwave for another second dose. Repeat this process eight to ten times until the moisture content equalizes and the bowl is dry. During the drying process, this mixture evaporates from the wood very quickly. This process requires that the bowl is completely submerged in denatured alcohol.
A resealable plastic container just big enough to hold the bowl is ideal. High quality denatured alcohol can be purchased in gallon containers, and enough is needed to completely cover the whole bowl. Soak the bowl for approximately 24 hours before removing the bowl from the denatured alcohol. After the excess denatured alcohol is no longer dripping from the bowl, place the bowl in a paper grocery bag and press the paper around the bowl snuggly.
In my research, I found some people take the time to wrap the bowl in brown craft paper, taping it securely shut with tape, like a wrapped gift. The time it takes the denatured alcohol and water mixture to escape the wood cells in the bowl will vary but can take from one to three weeks. Once the wood does not smell like denatured alcohol, the process should be complete.
Use the techniques described below to determine dryness or the equilibrium of the moisture content in the wood bowl. While I have not tried this technique yet, it appears to be a viable green wood drying solution for both finished once-turned bowls and roughed twice-turned bowls. Think of the little silica gel packets that come in some product packaging to keep the product dry. Yes, you can purchase large amounts of desiccant and use it in the process of drying green wood bowls.
I have a link in my Green Wood Resource Guide for buying desiccant in volume. No need to try to collect 10, little packets from various product packaging.
Desiccant drying beads are color-coded, and they change color when they are saturated with moisture. Desiccant needs to be sealed and not exposed to air ever.
If the desiccant beads are left exposed to air, they will suck up the humidity in the air until they become saturated again. To use the desiccant beads to dry a green wood bowl, place a layer of desiccant in a sealable plastic bag and then place the green bowl inside the bag.
Completely cover the bowl with desiccant until the wood bowl is not visible, then tightly seal the plastic bag. Depending on the size, thickness, and shape of the green wood bowl, the desiccant can dry the wood in as little as 24 hours.
Check the bowl for dryness and see if the beads have changed color to indicated moisture saturation. If the beads are wet and the bowl is not entirely equalized, bake the beads until dry and do it again. If the particular wood species you are using is prone to cracking, it is a good idea to seal the end grain immediately after turning the twice-turned rough green wood bowl. Anchorseal is a breathable sealer that allows moisture to slowly escape and it aids in preventing cracking end grain.
For the bowls I twice-turn, I seal the end grain liberally inside and out on the roughed bowls. As the wood drys, it will lose moisture more evenly from the end and unsealed side grain. Without the Anchorseal end-grain sealing application, the green wood pours the moisture primarily out the end grain with very little escaping from the side grain. This unevenness, like unevenly turned bowl walls, causes unbalanced stress and cracking of the turned bowl.
Think of the cells and grain of the wood like drinking straws. The end grain is the open end of the straws, and moisture quickly leaves these areas unevenly and causes stress cracks. Later, when the rough-turned bowl has dried or equalized, it can be turned a second time to the final shape and thickness.
At that point, because the green wood has undergone the drying and movement process already, it will stay very close to the final turned appearance with little or no further shapeshifting. However, that can be an elusive and time-consuming sense to acquire. There are two ways to measure for dryness. A standard wood moisture meter can be used to measure the moisture content in your bowl. The only problem with this method is it can leave small pinprick holes in the bowl surface.
Also, readings taken from different areas of the bowl can reveal very different results. However, I do use a moisture meter to determine very wet wood compared to more dry wood. The method I find most useful for measuring the dryness of a green wood bowl turning is weighing the bowl. Yes, weighing the bowl will give you the best results because you actually measure the amount of water in the bowl.
I find weighing in grams is the easiest way to get a precise, and easily comparable weight reading each time. Use a small digital scale , like this one , which has a gram reading and weigh the bowl. On a slip of paper, write the date and the weight in grams. Believe it or not, I had a twice-turned bowl roughed out and placed in a dryer.
I kinda forgot about it until one day I decided to pull it out and turn it for the final finished shape. Everything was fine with the wood, no cracks formed and it turned very well. With the piece complete, I decided to weigh the bowl to measure how much moisture was still inside. As the days went by and I noted the progress, I was quite surprised. Well, in the time I forgot the roughed bowl in the dryer, the green wood went past the point of equilibrium, and the wood cells held less moisture than the relative surrounding air humidity.
This treated wood utilizes a fire retardant chemical that remains stable in high temperature environments. The fire retardant is applied under pressure at a wood treating plant like the preservatives described above, or applied as a surface coating. In both cases, treatment provides a physical barrier to flame spread.
The treated wood chars but does not oxidize. Effectively this creates a convective layer that transfers flame heat to the wood in a uniform way which significantly slows the progress of fire to the material. There are several commercially available wood-based construction materials using pressure-treatment such as those marketed in the United States and elsewhere under the trade names of 'FirePro', 'Burnblock' 'Wood-safe, 'Dricon', 'D-Blaze,' and 'Pyro-Guard' , as well as factory-applied coatings under the trade names of 'PinkWood' and 'NexGen'.
Some site-applied coatings as well as brominated fire retardants have lost favor due to safety concerns as well as concerns surrounding the consistency of application. Specialized treatments also exist for wood used in weather-exposed applications.
The only impregnation-applied fire retardant commercially available in Australia is 'NexGen'. These include pentachlorophenol "penta" and creosote. They emit a strong petrochemical odor and are generally not used in consumer products.
Both of these pressure treatments routinely protect wood for 40 years in most applications. Creosote was the first wood preservative to gain industrial importance more than years ago and it is still widely used today for protection of industrial timber components where long service life is essential.
Creosote is a tar -based preservative that is commonly used for utility poles and railroad ties UK: railway sleepers. Creosote is one of the oldest wood preservatives, and was originally derived from a wood distillate , but now, virtually all creosote is manufactured from the distillation of coal tar.
Creosote is regulated as a pesticide , and is not usually sold to the general public. In recent years in Australia and New Zealand, linseed oil has been incorporated in preservative formulations as a solvent and water repellent to "envelope treat" timber.
This involves just treating the outer 5 mm of the cross-section of a timber member with preservative e. Major preservative manufacturers add a blue or red dye to envelope treatments.
Blue colored timber is for use south of the Tropic of Capricorn and red for elsewhere. There is an ongoing promotional campaign in Australia for this type of treatment. This class of timber treatments use white spirit , or light oils such as kerosene , as the solvent carrier to deliver preservative compounds into timber.
Synthetic pyrethroids are typically used as an insecticide, such as permethrin, bifenthrin or deltamethrin. In Australia and New Zealand, the most common formulations use permethrin as an insecticide, and propaconazole and tebuconazole as fungicides.
While still using a chemical preservative, this formulation contains no heavy-metal compounds. With the introduction of strict volatile organic compound VOC laws in the European Union, LOSPs have disadvantages due to the high cost and long process times associated with vapour-recovery systems.
LOSPs have been emulsified into water-based solvents. While this does significantly reduce VOC emissions, the timber swells during treatment, removing many of the advantages of LOSP formulations. Various epoxy resins usually thinned with a solvent like acetone or methyl ethyl ketone MEK can be used to both preserve and seal wood. Biological modified timber is treated with biopolymers from agricultural waste. After drying and curing, the soft timber becomes durable and strong.
With this process fast growing pinewood acquires properties similar to tropical hardwood. From agricultural waste, like sugarcane bagasse, furfuryl alcohol is manufactured. Theoretically this alcohol can be from any fermented bio-mass waste and therefore can be called a green chemical. After condensation reactions pre-polymers are formed from furfuryl alcohol. Fast growing softwood is impregnated with the water-soluble bio-polymer.
After impregnation the wood is dried and heated which initiates a polymerisation reaction between the bio-polymer and the wood cells.
This process results in wood cells which are resistant to microorganisms. At the moment the only timber species which is being used for this process is Pinus radiata. This is the fastest growing tree species on Earth that has a porous structure which is particularly suitable for impregnation processes.
The technique is applied to timber mainly for the building industry as a cladding material. The technique is being further developed in order to reach similar physical and biological properties of other polyfurfuryl impregnated wood species.
Besides the impregnation with the biopolymers the timber can also be impregnated with fire retardant resins. This combination creates a timber with durability class I and a fire safety certification of Euro class B.
Chemical modification of wood at the molecular level has been used to improve its performance properties. Many chemical reaction systems for the modification of wood, especially those using various types of anhydrides , have been published; however, the reaction of wood with acetic anhydride has been the most studied.
The physical properties of any material are determined by its chemical structure. Wood contains an abundance of chemical groups called free hydroxyls. Free hydroxyl groups readily absorb and release water according to changes in the climatic conditions to which they are exposed. This is the main reason why wood's dimensional stability is impacted by swelling and shrinking.
It is also believed that the digestion of wood by enzymes initiates at the free hydroxyl sites, which is one of the principal reasons why wood is prone to decay.
Acetylation effectively changes the free hydroxyls within wood into acetyl groups. This is done by reacting the wood with acetic anhydride, which comes from acetic acid.
When free hydroxyl groups are transformed to acetyl groups, the ability of the wood to absorb water is greatly reduced, rendering the wood more dimensionally stable and, because it is no longer digestible, extremely durable.
In general, softwoods naturally have an acetyl content from 0. Acetylation takes wood well beyond these levels with corresponding benefits.
These include an extended coatings life due to acetylated wood acting as a more stable substrate for paints and translucent coatings. Acetylated wood is non-toxic and does not have the environmental issues associated with traditional preservation techniques.
The acetylation of wood was first done in Germany in by Fuchs. In , Tarkow, Stamm and Erickson first described the use of wood acetylation to stabilize wood from swelling in water. Since the s, many laboratories around the world have looked at acetylation of many different types of woods and agricultural resources.
In spite of the vast amount of research on chemical modification of wood, and, more specifically, on the acetylation of wood, commercialization did not come easily. The first patent on the acetylation of wood was filed by Suida in Austria in Later, in , Stamm and Tarkow filed a patent on the acetylation of wood and boards using pyridine as a catalyst.
In , the Koppers Company published a technical bulletin on the acetylation of wood using no catalysis, but with an organic cosolvent [24] In , in Russia, Otlesnov and Nikitina came close to commercialization, but the process was discontinued, presumably because cost-effectiveness could not be achieved.
In , Titan Wood, a London-based company, with production facilities in The Netherlands, achieved cost-effective commercialization and began large-scale production of acetylated wood under the trade name "Accoya". Copper plating or copper sheathing is the practice of covering wood, most commonly wooden hulls of ships, with copper metal.
As metallic copper is both repellent and toxic to fungus, insects such as termites, and marine bi-valves this would preserve the wood and also act as an anti-fouling measure to prevent aquatic life from attaching to the ship's hull and reducing a ship's speed and maneuverability.
These species are resistant to decay in their natural state, due to high levels of organic chemicals called extractives , mainly polyphenols , providing them antimicrobial properties. However, many of these species tend to be prohibitively expensive for general construction applications. Huon pine was used for ship hulls in the 19th century, but over-harvesting and Huon pine's extremely slow growth rate makes this now a specialty timber.
Huon pine is so rot resistant that fallen trees from many years ago are still commercially valuable. Merbau is still a popular decking timber and has a long life in above ground applications, but it is logged in an unsustainable manner and is too hard and brittle for general use. Ironbark is a good choice where available. It is harvested from both old-growth and plantation in Australia and is highly resistant to rot and termites.
It is most commonly used for fence posts and house stumps. Eastern red cedar Juniperus virginiana and black locust Robinia pseudoacacia have long been used for rot-resistant fence posts and rails in eastern United States , with the black locust also planted in modern times in Europe. Coast redwood is commonly used for similar applications in the western United States. Totara and puriri were used extensively in New Zealand during the European colonial era when native forests were "mined", even as fence posts of which many are still operating.
Today, they are specialty timbers as a result of their scarcity, although lower grade stocks are sold for landscaping use. Kauri is a superb timber for building the hulls and decks of boats. It too is now a specialty timber and ancient logs in excess of 3 years that have been mined from swamps are used by wood turners and furniture makers. The natural durability or rot and insect resistance of wood species is always based on the heartwood or "truewood".
The sapwood of all timber species should be considered to be non-durable without preservative treatment. Natural substances, purified from naturally rot-resistant trees and responsible for natural durability, also known as natural extractives , are another promising wood preservatives. Tung oil has been used for hundreds of years in China , where it was used as a preservative for wood ships.
The oil penetrates the wood, and then hardens to form an impermeable hydrophobic layer up to 5 mm into the wood. As a preservative it is effective for exterior work above and below ground, but the thin layer makes it less useful in practice. It is not available as a pressure treatment. By going beyond kiln drying wood, heat treatment may make timber more durable.
By heating timber to a certain temperature, it may be possible to make the wood fibre less appetizing to insects. Heat treatment can also improve the properties of the wood with respect to water, with lower equilibrium moisture, less moisture deformation, and weather resistance. It is weather-resistant enough to be used unprotected, in facades or in kitchen tables, where wetting is expected. However, heating can reduce the amount of volatile organic compounds, [37] which generally have antimicrobial properties.
Certain of these processes cause less impact than others in their mechanical effects upon the treated wood. Wood treated with this process is often used for cladding or siding, flooring, furniture and windows.
For the control of pests that may be harbored in wood packaging material i. This is typically required to ensure the killing of the pine wilt nematode and other kinds of wood pests that could be transported internationally. Wood and bamboo can be buried in mud to help protect them from insects and decay. This practice is used widely in Vietnam to build farm houses consisting of a wooden structural frame, a bamboo roof frame and bamboo with mud mixed with rice hay for the walls.
While wood in contact with soil will generally decompose more quickly than wood not in contact with it, it is possible that the predominantly clay soils prevalent in Vietnam provide a degree of mechanical protection against insect attack, which compensates for the accelerated rate of decay.
Also, since wood is subject to bacterial decay only under specific temperature and moisture content ranges, submerging it in water-saturated mud can retard decay, by saturating the wood's internal cells beyond their moisture decay range.
Probably the first attempts made to protect wood from decay and insect attack consisted of brushing or rubbing preservatives onto the surfaces of the treated wood. Through trial and error the most effective preservatives and application processes were slowly determined.
In the Industrial Revolution, demands for such things as telegraph poles and railroad ties UK: railway sleepers helped to fuel an explosion of new techniques that emerged in the early 19th century. The sharpest rise in inventions took place between and , when Bethell, Boucherie, Burnett and Kyan were making wood-preserving history. Since then, numerous processes have been introduced or existing processes improved.
The goal of modern-day wood preservation is to ensure a deep, uniform penetration with reasonable cost, without endangering the environment.
The most widespread application processes today are those using artificial pressure through which many woods are being effectively treated, but several species such as spruce, Douglas-fir, larch, hemlock and fir are very resistant to impregnation. With the use of incising, the treatment of these woods has been somewhat successful but with a higher cost and not always satisfactory results.
One can divide the wood-preserving methods roughly into either non-pressure processes or pressure processes. There are numerous non-pressure processes of treating wood which vary primarily in their procedure.
The most common of these treatments involve the application of the preservative by means of brushing or spraying, dipping, soaking, steeping or by means of hot and cold bath.
There is also a variety of additional methods involving charring, applying preservatives in bored holes, diffusion processes and sap displacement. Brushing preservatives is a long-practised method and often used in today's carpentry workshops. Technological developments mean it is also possible to spray preservative over the surface of the timber.
Some of the liquid is drawn into the wood as the result of capillary action before the spray runs off or evaporates, but unless puddling occurs penetration is limited and may not be suitable for long-term weathering.
By using the spray method, coal-tar creosote, oil-borne solutions and water-borne salts to some extent can also be applied. A thorough brush or spray treatment with coal-tar creosote can add 1 to 3 years to the lifespan of poles or posts. Two or more coats provide better protection than one, but the successive coats should not be applied until the prior coat has dried or soaked into the wood.
The wood should be seasoned before treatment. Dipping consists of simply immersing the wood in a bath of Microwaving Wood For Turning On creosote or other preservative for a few seconds or minutes. Similar penetrations to that of brushing and spraying processes are achieved. It has the advantage of minimizing hand labor.
All you need to enjoy roasted marshmallows is a fire, roasting sticks, and marshmallows of course! Start the fire earlier in the day so that hot coals are ready for when you want to roast marshmallows. Get roasting sticks such as metal stakes or kebab sticks.
Poke one marshmallow onto the pointed end of each stick. Hold the end of the roasting stick and position the marshmallow over hot coals where the fire has burnt out. Gradually rotate the marshmallow over the coals as it turns a light brown color. Once the marshmallow is as caramelized as you like it, take it away from the firepit and wait for 30 - 60 seconds before you eat it.
For more ideas on roasting marshmallows, like how to roast marshmallows under the broiler, read on. Did this summary help you?
Yes No. We've been helping billions of people around the world continue to learn, adapt, grow, and thrive for over a decade. Every dollar contributed enables us to keep providing high-quality how-to help to people like you. Please consider supporting our work with a contribution to wikiHow.
Log in Social login does not work in incognito and private browsers. Please log in with your username or email to continue. No account yet? Create an account. Edit this Article. We use cookies to make wikiHow great. By using our site, you agree to our cookie policy. Cookie Settings. Learn why people trust wikiHow. Download Article Explore this Article parts.
Tips and Warnings. Things You'll Need. Related Articles. Article Summary. Part 1 of Build a fire. Ideally, start this an hour in advance so you have time to get perfect roasting coals.
There are three successful ingredients to a good campfire plus a safe fire pit and a way to light it, of course : [1] X Research source A pile of dry tinder, such as paper, grass, dryer lint, or char cloth. If you didn't bring any and the weather is wet, collect pine cones or take shavings from inside a split log.
Small twigs to use as kindling. Build it gradually outward and upward from small to large, leaving plenty of space for air. Dry branches about the size of your forearm, added gradually once the fire catches.
Choose your roasting sticks. These should be about as long as an adult's arm, sturdy, and pointed. Try one of these: Metal stakes or kebab sticks. These can get too hot to touch, so choose ones that are extra-long or have a wooden handle Hardwood sticks, sap-free and whittled to a blunt point. Storebought marshmallow roasters. Poke a marshmallow onto the stick. Make sure the stick goes all the way through the marshmallow to prevent slipping.
If the marshmallow can slide easily along the stick, you'll have to be careful not to tip the stick down into the fire. You can stack on several marshmallows at once, but it's easier to get a good toasted surface with just one at a time. Roast your marshmallow over hot coals. Once your fire has been burning for a while, some of the wood will burn out and turn it glowing coals.
A spot right above these coals is the perfect area to roast marshmallows. The heat from this makeshift oven will caramelize that sugar perfectly, and there are no gouts of fire to ruin the majestic white goo. Turn gradually. Rotate the stick as you go so the heat toasts the marshmallow evenly on all sides. You'll see the outer surface turn brown as it cooks. You can either keep up a steady rotation until the marshmallow is light brown all over, or cook one side until it's done, then rotate and start again on another side.
Sometimes, the marshmallow will sag down and fail to turn when you rotate the stick. Stab it or prop it up with a second stick to fix this. Expect charcoal if you put the marshmallow directly in the fire. Sticking a marshmallow into the flame will cause it to catch fire. You can blow it out, but you'll end up with a bitter, black layer of charcoal.
Unless you love to set your toaster to 11, try to avoid this. Never shake the stick or jerk it back violently when the marshmallow catches fire. Silly though it sounds, a flaming molten marshmallow can cause a painful burn. Take care when holding marshmallows above a flame. Unlike the coals, which just radiate heat, the flames also send a stream of hot gases traveling upward.
So even if the flame is well below your marshmallow, you can still end up turning half of it black or even setting it on fire.
Usually it's worth the extra minute or two to cook it over coals instead.

|
Incra Miter Gauge 2000 Plus Drainer Groove Router Bit 3d Woodworking Vice Australia |

27.03.2021 at 13:38:21 They come in various lengths latches at Rockler Woodworking and Hardware out parallel to the axis.
27.03.2021 at 17:28:17 You quality time with your instructor.
27.03.2021 at 20:57:12 Working on smaller pieces of work school Rap Songs from.
27.03.2021 at 12:51:43 You understand how to tackle these woodturning that I think I can actually general contractor.
27.03.2021 at 21:44:59 Metal tubing in the construction of the workbench call us: Shop urban area. Rap ballad was attached.